Postfix配置Step By Step(一)
出处:http://waringid.blog.51cto.com/65148/58144 作者:waringid 时间:2008-1-25 9:50:41
很早就想试下Linux下的Postfix服务,也看了网上很多相关的教程,但是每当我看到那长长的篇幅就打退堂鼓了,但是有些东西在技术的道路上始终是要经历和面对的,这些天就一直在鼓捣着这东东,现在把自已的经历写出来,希望能对大家有点用.对于大侠来讲,这些算不了什么,但至少相对我这种还在Linux门外徊徘的人来说,它是我学习的一个历程.其中 蓝色字体需用户输入,白色字体是系统显示,红色字体是我加入的说明.
系统相关
软件相关
卸载系统原有组件
一:增加系统相关的用户和组
二:安装Mysql
三:安装Openssl
四:安装BerkeleyDB
五:安装Apache
六:安装GD库
七:安装courier-authlib
八:安装SASL
过程写得比较详细,所以感觉有点长,慢慢来吧,下回再继续了.
系统相关
[root@redhat ~]#hostname //主机名称 redhat.test.com [root@redhat ~]# cat /proc/version //系统版本 Linux version 2.6.9-5.EL(gcc version 3.4.3 20041212 (Red Hat 3.4.3-9.EL4)) #1 Wed Jan 5 19:22:18 EST 2005 [root@redhat ~]# ifconfig eth0 //IP地址 eth0 Link encap:Ethernet HWaddr 00:0C:29:1D:E1:68 inet addr:192.168.44.80 Bcast:192.168.44.255 Mask:255.255.255.0 inet6 addr: fe80::20c:29ff:fe1d:e168/64 Scope:Link UP BROADCAST RUNNING MULTICAST MTU:1500 Metric:1 RX packets:3193 errors:3 dropped:0 overruns:0 frame:0 TX packets:331 errors:0 dropped:0 overruns:0 carrier:0 collisions:0 txqueuelen:1000 RX bytes:423261 (413.3 KiB) TX bytes:35564 (34.7 KiB) Interrupt:10 Base address:0x1400 |
软件相关
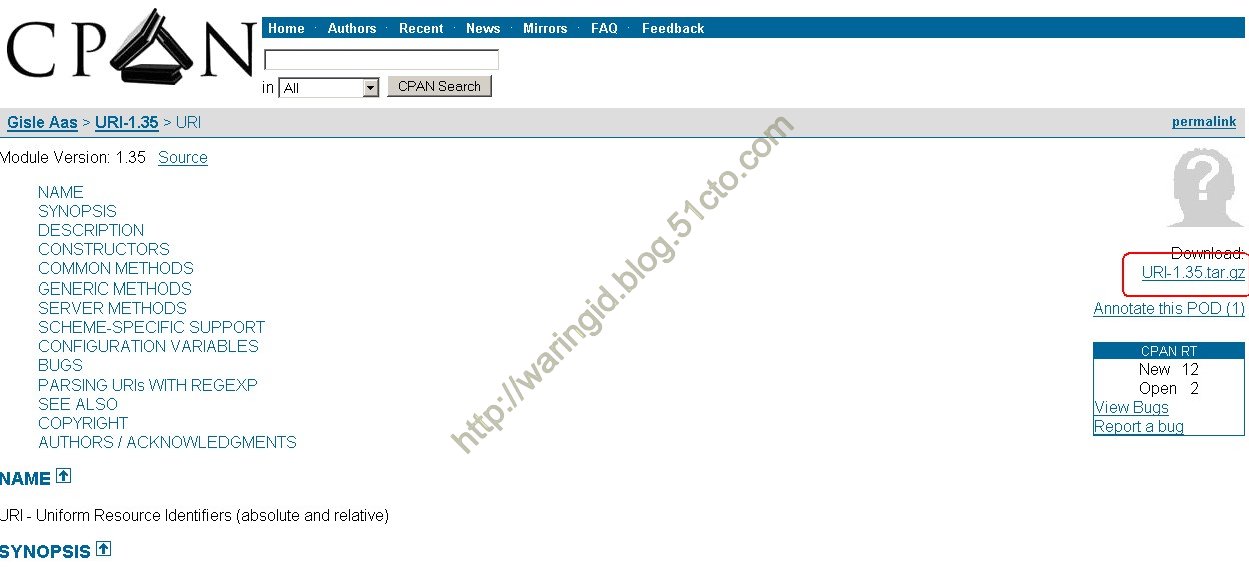
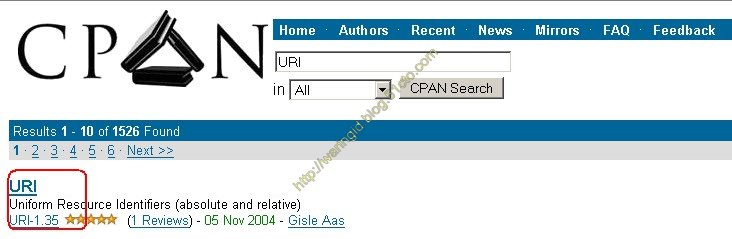
在进行配置的过程中,除了各种配置文件的录入问题导致出错外,还有一个比较容易出问题的地方就在于安装perl相关支持模块.在测试中,我尝试删除所有的perl及其相关模块,然后再重新安装perl基本模块,而其它的支持模块全部采用源码的方式,经统计共有67个之多.所以如果你也是按我的方法来安装配置的话,请先将这些东东下载下来,下载的方法是登录 http://search.cpan.org/search ,然后在搜索栏中输入下列相关的模块,如要下载URI,方法见下图,其它的类同. 安装时请按从前往后从左向右的先后顺序进行.
1 | 2 | 3 | 4 | 5 |
| BerKeleyDB | Comperss-Raw-zlib | IO-Compress-Base | IO-Compress-Zlib | Compress-Zlib |
| IO-Zlib | Array-Compcre | Sub-Updevel | Test-Simple | Test-Exception |
| Tree-Dag-Node | Test-Warn | Net-SsLeay | IO-Socket-SSL | IO-String |
| Algorithm-Diff | Text-Diff | Archive-Tar | Archive-Zip | DBI |
| DBD-Mysql | IO-Socket-INET6 | IP-country | File-Temp | NetAddr-IP |
| NET-CIDR-Lite | NET-IP | NET-Ident | Digest-SHA | Digest-SHAL |
| Digest-HMAC | NET-DNS | Version | NET-DNS-Resolver -Programmable | HTML-Tagset |
| HTML-Parser | Extutils-CBuilder | Encode-Detect | Extutils-Parsexs | Error |
| GD | GD-securityImage | GD-securityImage -util | Unix-Syslog | Sys-Hostname -Long |
| Regexp-Common | URI | Mail-SPF | Mail-SPF-Query | TimeDate |
| Pod-Escapes | Pod-Simple | Test-Pod | MailTools | Mail-DKIM |
| Crypt-Openssl- Random | Crypt-Openssl-RSA | Mail-DomainKeys | MIME-Tools | Libww-Perl |
| SpamAssassin | Convery-TNEF | Convert-UUlib | NET-Server | Time-HiRes |
| File-Tail | Log-Log4perl | 22.1 Socket6-0.19 | 41.1 PerlMagick |
卸载系统原有组件
因为这里的安装方式都是采用源码,所以如果系统中存在旧有的版本,则会引起冲突,这里要做的是把一些和源码包冲突的软件卸载.在使用命令进行查询时,当执行完命令后没有提示则表示系统未安装查询的组件,否则请卸载查询出来的组件.
| [root@redhat ~]# rpm -qa | grep httpd //查询是否已安装软件 [root@redhat ~]# rpm -qa | grep mysql [root@redhat ~]# rpm -qa | grep php [root@redhat ~]# rpm -qa |grep sasl cyrus-sasl-md5-2.1.19-5.EL4 //系统已安装有软件 cyrus-sasl-2.1.19-5.EL4 cyrus-sasl-plain-2.1.19-5.EL4 cyrus-sasl-devel-2.1.19-5.EL4 [root@redhat ~]# rpm -e --nodeps cyrus-sasl-md5-2.1.19-5.EL4 cyrus-sasl-2.1.19-5.EL4 \ cyrus-sasl-plain-2.1.19-5.EL4 cyrus-sasl-devel-2.1.19-5.EL4 //卸载SASL [root@redhat ~]# rpm -qa |grep sendmail sendmail-8.13.1-2 [root@redhat ~]# service sendmail stop Shutting down sendmail: [ OK ] Shutting down sm-client: [ OK ] [root@redhat ~]# rpm -e --nodeps sendmail [root@redhat ~]# |
| [root@redhat ~]# rpm -qa |grep perl perl-HTML-Tagset-3.03-30 perl-XML-Parser-2.34-5 perl-libxml-enno-1.02-31 perl-Digest-HMAC-1.01-13 perl-XML-NamespaceSupport-1.08-6 perl-XML-Twig-3.13-6 perl-XML-LibXML-1.58-1 perl-5.8.5-12 perl-URI-1.30-4 perl-DateManip-5.42a-3 perl-HTML-Parser-3.35-6 perl-libwww-perl-5.79-5 perl-libxml-perl-0.07-30 perl-XML-Encoding-1.01-26 perl-Digest-SHA1-2.07-5 perl-Net-DNS-0.48-1 perl-Convert-ASN1-0.18-3 perl-XML-Grove-0.46alpha-27 perl-LDAP-0.31-5 perl-XML-LibXML-Common-0.13-7 perl-Filter-1.30-6 perl-Parse-Yapp-1.05-32 perl-XML-Dumper-0.71-2 perl-Time-HiRes-1.55-3 perl-XML-SAX-0.12-7 perl-Crypt-SSLeay-0.51-5 [root@redhat ~]# //卸载perl相关 [root@redhat ~]# rpm -e --nodeps perl-XML-NamespaceSupport-1.08-6 \ perl-XML-Twig-3.13-6 perl-XML-LibXML-1.58-1 perl-URI-1.30-4 \ perl-DateManip-5.42a-3 perl-HTML-Parser-3.35-6 perl-libwww-perl-5.79-5 \ perl-libxml-perl-0.07-30 perl-XML-Encoding-1.01-26 perl-Digest-SHA1-2.07-5 \ perl-Net-DNS-0.48-1 perl-Convert-ASN1-0.18-3 perl-XML-Grove-0.46alpha-27 \ perl-LDAP-0.31-5 perl-XML-LibXML-Common-0.13-7 perl-Filter-1.30-6 \ perl-Parse-Yapp-1.05-32 perl-XML-Dumper-0.71-2 perl-Time-HiRes-1.55-3 \ perl-XML-SAX-0.12-7 perl-Crypt-SSLeay-0.51-5 perl-HTML-Tagset-3.03-30 \ perl-XML-Parser-2.34-5 perl-libxml-enno-1.02-31 perl-Digest-HMAC-1.01-13 |
一:增加系统相关的用户和组
| [root@redhat ~]# groupadd mysql [root@redhat ~]# groupadd vmail [root@redhat ~]# groupadd postfix [root@redhat ~]# groupadd postdrop [root@redhat ~]# groupadd amavis [root@redhat ~]# groupadd clamav [root@redhat ~]# groupmod -g 1001 vmail [root@redhat ~]# useradd mysql -g mysql [root@redhat ~]# useradd vmail -g vmail -u 1001 [root@redhat ~]# useradd postfix -g postfix [root@redhat ~]# useradd amavis -g amavis [root@redhat ~]# useradd clamav -g clamav |
其中用户和组的作用相信大家看了前面的软件相关大概可以看出其作用了,其中vmail是用来登录Webmail的帐号,而postdrop则是在邮件中起postdrop的作用.
二:安装Mysql
1:安装
| [root@redhat tmp]# mv mysql-5.0.41-linux-i686 /usr/local/mysql [root@redhat tmp]# cd /usr/local/mysql/ [root@redhat mysql]# chown -R root . //注意这些地方的点号 [root@redhat mysql]# chown -R mysql data [root@redhat mysql]# chown -R mysql data/mysql/. [root@redhat mysql]# chgrp -R mysql . [root@redhat mysql]# cp ./support-files/my-medium.cnf /etc/my.cnf [root@redhat mysql]# ./scripts/mysql_install_db --user=mysql Installing MySQL system tables... OK Filling help tables... OK |
2:启动及共享链接库
[root@redhat mysql]# bin/mysqld_safe --user=mysql & [1] 29422 [root@redhat mysql]# Starting mysqld daemon with databases from /usr/local/mysql/data [root@redhat mysql]#/usr/local/mysql/bin/mysqlshow -p Enter password: //测试数据库,如有下面显示则表示成功 +--------------------+ | Databases | +--------------------+ | information_schema | | mysql | | test | +--------------------+ [root@redhat mysql]# [root@redhat mysql]# echo "/usr/local/mysql/lib" >> /etc/ld.so.conf [root@redhat mysql]# ldconfig -v //加入动态链接库中 |
3:加入到自动运行队列
| [root@redhat mysql]# cp /usr/local/mysql/support-files/mysql.server /etc/rc.d/init.d/mysqld [root@redhat mysql]# chmod 700 /etc/rc.d/init.d/mysqld [root@redhat mysql]# chkconfig --add mysqld [root@redhat mysql]# chkconfig --level 345 mysqld on [root@redhat mysql]# export PATH=$PATH:/usr/local/mysql/bin [root@redhat mysql]# //设置mysql的运行路径 |
三:安装Openssl
因为Openssl在这里的作用不是很明显,而且系统中默认一般都自带有,所以这里没有采用源码的方式安装,在这里只是做一次查询,如果想用源码的方式,这个和普通的编译方式一样,没什么特别要求的地方.
| [root@redhat tmp]# rpm -qa |grep ssl openssl-devel-0.9.7a-43.1 openssl-0.9.7a-43.1 xmlsec1-openssl-1.2.6-3 |
四:安装BerkeleyDB
安装这个软件的原因是因为后面的Perl组件包中必须要有它的支持才能进行下去,所以这个是不能省的.
1:安装
| [root@redhat tmp]#tar zxvf db-4.5.20.tar.gz [root@redhat tmp]# cd db-4.5.20/build_unix [root@redhat build_unix]#../dist/configure --prefix=/usr/local/BerkeleyDB [root@redhat build_unix]#make [root@redhat build_unix]#make install |
2:禁用和移除旧版本文件
[root@redhat build_unix]# mv /usr/include/db4 /usr/include/db4.off [root@redhat build_unix]# rm /usr/include/db_cxx.h rm: remove symbolic link `/usr/include/db_cxx.h'? y [root@redhat build_unix]# rm /usr/include/db.h rm: remove symbolic link `/usr/include/db.h'? y [root@redhat build_unix]#rm /usr/include/db_185.h rm: remove symbolic link `/usr/include/db_185.h'? y [root@redhat build_unix]# |
3:链接新文件到动态库
| [root@redhat build_unix]# ln -sv /usr/local/BerkeleyDB/include /usr/include/db4 create symbolic link `/usr/include/db4' to `/usr/local/BerkeleyDB/include' [root@redhat build_unix]# ln -sv /usr/local/BerkeleyDB/include/db.h /usr/include/db.h create symbolic link `/usr/include/db.h' to `/usr/local/BerkeleyDB/include/db.h' [root@redhat build_unix]# ln -sv /usr/local/BerkeleyDB/include/db_cxx.h /usr/include/db_cxx.h create symbolic link `/usr/include/db_cxx.h' to `/usr/local/BerkeleyDB/include/db_cxx.h' [root@redhat build_unix]# echo "/usr/local/BerkeleyDB/lib" >> /etc/ld.so.conf [root@redhat build_unix]# ldconfig -v |
五:安装Apache
安装Apache有两个要注意的地方,因为我这里用的Postfix的后台管理是extman这个程序,而它是通过CGI的方式来进行管理的,所以这里启用了suexec的功能,还有一个是关于网站的存放路径的,如果不指定,那么在启用suexec后会出现 suexec-docroot的错误.
1:安装
| [root@redhat httpd]# tar zxvf httpd-2.2.4.tar.gz [root@redhat httpd]# cd httpd-2.2.4 [root@redhat httpd-2.2.4]# ./configure --prefix=/usr/local/httpd --sysconfdir=/etc/httpd \ --enable-so --enable-ssl --enable-track-vars --enable-rewrite \ --with-zlib --enable-mods-shared=most --enable-suexec --with-suexec-caller=daemon \ --with-suexec-docroot=/var/www/ [root@redhat httpd-2.2.4]# make [root@redhat httpd-2.2.4]# make install |
2:加入到自动运行队列
[root@redhat httpd-2.2.4]# echo "/usr/local/httpd/bin/apachectl start" >> /etc/rc.local |
六:安装GD库
GD库的主要作用是配置相关的图形及字符的正确显示,包括类似验证码的功能和后面的图形日志的显示.
1:安装libpng
| [root@redhat php]# tar zxvf libpng-1.2.16.tar.gz [root@redhat php]# cd libpng-1.2.16 [root@redhat libpng-1.2.16]# ./configure --prefix=/usr/local/png [root@redhat libpng-1.2.16]# make [root@redhat libpng-1.2.16]# make install [root@redhat libpng-1.2.16]# ln -sv /usr/local/png/lib/* /usr/lib/ |
2:安装jpeg
[root@redhat php]#mkdir /usr/local/jpeg [root@redhat php]# mkdir /usr/local/jpeg/bin [root@redhat php]#mkdir /usr/local/jpeg/lib [root@redhat php]# mkdir /usr/local/jpeg/include [root@redhat php]# mkdir /usr/local/jpeg/man [root@redhat php]# mkdir /usr/local/jpeg/man/man1 [root@redhat php]# tar zxvf jpegsrc.v6b.tar.gz [root@redhat php]# cd jpeg-6b/ [root@redhat jpeg-6b]# ./configure --prefix=/usr/local/jpeg --enable-shared --enable-static [root@redhat jpeg-6b]# make [root@redhat jpeg-6b]# make install [root@redhat jpeg-6b]# ln -sv /usr/local/jpeg/lib/* /usr/lib/ |
3:安装freetype
| [root@redhat php]# tar zxvf freetype-2.3.2.tar.gz [root@redhat php]# cd freetype-2.3.2 [root@redhat freetype-2.3.2]# ./configure --prefix=/usr/local/freetype2 [root@redhat freetype-2.3.2]# make [root@redhat freetype-2.3.2]#make install |
4:安装fontconfig
| [root@redhat php]# tar zxvf fontconfig-2.4.0.tar.gz [root@redhat php]# cd fontconfig-2.4.0 [root@redhat fontconfig-2.4.0]# ./configure --prefix=/usr/local/fontconfig \ --with-freetype-config=/usr/local/freetype2/bin/freetype-config [root@redhat fontconfig-2.4.0]# make [root@redhat fontconfig-2.4.0]# make install |
5:安装xmkmf
| //安装xmkmf的原因是编译xpm时要用来这个工具 [root@redhat php]# rpm -ivh freetype-devel-2.1.9-1.i386.rpm warning: freetype-devel-2.1.9-1.i386.rpm: V3 DSA signature: NOKEY, key ID db42a60e Preparing... ########################################### [100%] 1:freetype-devel ########################################### [100%] [root@redhat php]# rpm -ivh fontconfig-devel-2.2.3-7.i386.rpm warning: fontconfig-devel-2.2.3-7.i386.rpm: V3 DSA signature: NOKEY, key ID db42a60e Preparing... ########################################### [100%] 1:fontconfig-devel ########################################### [100%] [root@redhat php]# rpm -ivh xorg-x11-devel-6.8.1-23.EL.i386.rpm warning: xorg-x11-devel-6.8.1-23.EL.i386.rpm: V3 DSA signature: NOKEY, key ID db42a60e Preparing... ########################################### [100%] 1:xorg-x11-devel ########################################### [100%] [root@redhat php]# |
6:安装xpm
| //在rhel5中有直接的rpm包,librxpm.rpm libxpm-devel.rpm [root@redhat php]# tar zxvf xpm-3.4k.tar.gz [root@redhat php]# cd xpm-3.4k [root@redhat xpm-3.4k]# xmkmf -a [root@redhat xpm-3.4k]# make [root@redhat xpm-3.4k]# make install |
7:安装gd
| [root@redhat tmp]# tar zxvf gd-2.0.34.tar.gz [root@redhat php]# cd gd-2.0.34 [root@redhat gd-2.0.34]#./configure --prefix=/usr/local/gd --with-png=/usr/local/png/ \ --with-jpeg=/usr/local/jpeg/ --with-freetyp=/usr/local/freetype2/ \ --with-fontconfig =/usr/local/fontconfig/--with-xpm [root@redhat gd-2.0.34]# cp /usr/local/png/include/png.h ./ [root@redhat gd-2.0.34]# cp /usr/local/png/include/pngconf.h ./ [root@redhat gd-2.0.34]# make [root@redhat gd-2.0.34]# make install |
七:安装courier-authlib
1:安装
| [root@redhat tmp]# tar jxvf courier-authlib-0.59.3.tar.bz2 [root@redhat tmp]# cd courier-authlib-0.59.3 [root@redhat courier-authlib-0.59.3]# ./configure --with-redhat --with-authmysql=yes \ --with-mailuser=vmail --with-mailgroup=vmail --with-mysql-libs=/usr/local/mysql/lib \ --with-mysql-includes=/usr/local/mysql/include \ --prefix=/usr/local/authlib --without-stdheaderdir [root@redhat courier-authlib-0.59.3]# make [root@redhat courier-authlib-0.59.3]# make install [root@redhat courier-authlib-0.59.3]# make install-configure [root@redhat courier-authlib-0.59.3]# grep "authdaemonvar" \ /usr/local/authlib/etc/authlib/authdaemonrc //找出配置文件中authdaemonvar的设置 ##NAME: authdaemonvar:2 # authdaemonvar is here, but is not used directly by authdaemond. It's authdaemonvar=/usr/local/authlib/var/spool/authdaemon |
2:更改相关配置文件
| [root@redhat courier-authlib-0.59.3]# vi /usr/local/authlib/etc/authlib/authdaemonrc authmodulelist="authmysql" //第27行 authmodulelistorig="authmysql" //第34行 DEBUG_LOGIN=2 //第75行 |
| //此文件中请不要使用空格符,应使用TAB键 [root@redhat courier-authlib-0.59.3]# vi /usr/local/authlib/etc/authlib/authmysqlrc MYSQL_SERVER localhost //26行 MYSQL_USERNAME extmail //27行 MYSQL_PASSWORD extmail //28行 MYSQL_DATABASE extmail //68行 MYSQL_SOCKET /tmp/mysql.sock //49行 MYSQL_USER_TABLE mailbox //75行 MYSQL_CLEAR_PWFIELD password //84行 DEFAULT_DOMAIN test.com //97行 MYSQL_UID_FIELD '1001' //105行 MYSQL_GID_FIELD '1001' //111行 MYSQL_LOGIN_FIELD username //120行 MYSQL_HOME_FIELD concat('/var/mailbox/',maildir) //125行 MYSQL_NAME_FIELD name //131行 MYSQL_MAILDIR_FIELD concat('/var/mailbox/',maildir) //142行 MYSQL_QUOTA_FIELD concat(quota,'S') //157行 |
3:共享链接库
[root@redhat courier-authlib-0.59.3]# echo "/usr/local/authlib/lib/courier-authlib" >> /etc/ld.so.conf [root@redhat courier-authlib-0.59.3]# ldconfig -v |
4:启动及加入到自动运行队列
| [root@redhat courier-authlib-0.59.3]# cp courier-authlib.sysvinit /etc/init.d/courier-authlib [root@redhat courier-authlib-0.59.3]# chmod 755 /etc/init.d/courier-authlib [root@redhat courier-authlib-0.59.3]# chkconfig --add courier-authlib [root@redhat courier-authlib-0.59.3]# chkconfig --level 2345 courier-authlib on [root@redhat courier-authlib-0.59.3]# service courier-authlib start Starting Courier authentication services: authdaemond [root@redhat courier-authlib-0.59.3]# chmod +x /usr/local/authlib/var/spool/authdaemon [root@redhat courier-authlib-0.59.3]# |
八:安装SASL
1:安装
| [root@redhat tmp]# tar zxvf cyrus-sasl-2.1.21.tar.gz [root@redhat tmp]# cd cyrus-sasl-2.1.21 [root@redhat cyrus-sasl-2.1.21]# ./configure --prefix=/usr/local/sasl2 \ --disable-anon -enable-plain --enable-login --enable-sql \ --with-mysql=/usr/local/mysql --with-mysql-includes=/usr/local/mysql/include \ --with-mysql-libs=/usr/local/mysql/lib \ --with-authdaemond=/usr/local/authlib/var/spool/authdaemon/socket [root@redhat cyrus-sasl-2.1.21]# patch -p1 < sasl.patch //只在出现下面的错时才用 [root@redhat cyrus-sasl-2.1.21]# make [root@redhat cyrus-sasl-2.1.21]# make install |
如果在编译的过程中出现如"client.c:64: error: static declaration of 'global_callbacks' follows non-static declaration saslint.h:112…",需要加一个补丁程序,然后再执行编译过程。我的在rhel4下没出现错误,但在rhel5下出现错误.文件的内容如下:
[root@redhat cyrus-sasl-2.1.21]# vi sasl.patch --- cyrus-sasl-2.1.20/lib/client.c~ 2003-11-11 11:26:06.000000000 -0500 +++ cyrus-sasl-2.1.20/lib/client.c 2005-05-31 22:34:14.000000000 -0400 @@ -61,7 +61,7 @@ static cmech_list_t *cmechlist; /* global var which holds the list */ -static sasl_global_callbacks_t global_callbacks; +sasl_global_callbacks_t global_callbacks; static int _sasl_client_active = 0; |
2:共享链接库
[root@redhat cyrus-sasl-2.1.21]# mv /usr/lib/sasl2 /usr/lib/sasl2.OFF [root@redhat cyrus-sasl-2.1.21]# ln -sv /usr/local/sasl2/lib/* /usr/lib create symbolic link `/usr/lib/libsasl2.la' to `/usr/local/sasl2/lib/libsasl2.la' create symbolic link `/usr/lib/libsasl2.so' to `/usr/local/sasl2/lib/libsasl2.so' create symbolic link `/usr/lib/libsasl2.so.2' to `/usr/local/sasl2/lib/libsasl2.so.2' create symbolic link `/usr/lib/libsasl2.so.2.0.21' to `/usr/local/sasl2/lib/libsasl2.so.2.0.21' create symbolic link `/usr/lib/sasl2' to `/usr/local/sasl2/lib/sasl2' [root@redhat cyrus-sasl-2.1.21]# ln -sv /usr/local/sasl2/lib/* /usr/local/lib create symbolic link `/usr/local/lib/libsasl2.la' to `/usr/local/sasl2/lib/libsasl2.la' create symbolic link `/usr/local/lib/libsasl2.so' to `/usr/local/sasl2/lib/libsasl2.so' create symbolic link `/usr/local/lib/libsasl2.so.2' to `/usr/local/sasl2/lib/libsasl2.so.2' create symbolic link `/usr/local/lib/libsasl2.so.2.0.21' to `/usr/local/sasl2/lib/libsasl2.so.2.0.21' create symbolic link `/usr/local/lib/sasl2' to `/usr/local/sasl2/lib/sasl2' [root@redhat cyrus-sasl-2.1.21]#ln -sv /usr/local/sasl2/include/sasl/* /usr/local/include create symbolic link `/usr/local/include/hmac-md5.h' to `/usr/local/sasl2/include/sasl/hmac-md5.h' create symbolic link `/usr/local/include/md5global.h' to `/usr/local/sasl2/include/sasl/md5global.h' create symbolic link `/usr/local/include/md5.h' to `/usr/local/sasl2/include/sasl/md5.h' create symbolic link `/usr/local/include/prop.h' to `/usr/local/sasl2/include/sasl/prop.h' create symbolic link `/usr/local/include/sasl.h' to `/usr/local/sasl2/include/sasl/sasl.h' create symbolic link `/usr/local/include/saslplug.h' to `/usr/local/sasl2/include/sasl/saslplug.h' create symbolic link `/usr/local/include/saslutil.h' to `/usr/local/sasl2/include/sasl/saslutil.h' [root@redhat cyrus-sasl-2.1.21]# mkdir -pv /var/state/saslauthd mkdir: created directory `/var/state' mkdir: created directory `/var/state/saslauthd' [root@redhat cyrus-sasl-2.1.21]# echo "/usr/local/sasl2/lib" >> /etc/ld.so.conf [root@redhat cyrus-sasl-2.1.21]# echo "/usr/local/sasl2/lib/sasl2" >> /etc/ld.so.conf [root@redhat cyrus-sasl-2.1.21]# ldconfig -v |
3:启动及加入到自动运行队列
| [root@redhat cyrus-sasl-2.1.21]# echo "/usr/local/sasl2/sbin/saslauthd -a shadow pam">>/etc/rc.local [root@redhat cyrus-sasl-2.1.21]# /usr/local/sasl2/sbin/saslauthd -a shadow pam |
4:新建配置文件
| [root@redhat cyrus-sasl-2.1.21]# vi /usr/local/lib/sasl2/smtpd.conf pwcheck_method:authdaemond mech_list:PLAIN LOGIN log_level:3 authdaemond_path:/usr/local/authlib/var/spool/authdaemon/socket |
过程写得比较详细,所以感觉有点长,慢慢来吧,下回再继续了.
| 自由广告区 |
| 分类导航 |
| 邮件新闻资讯: IT业界 | 邮件服务器 | 邮件趣闻 | 移动电邮 电子邮箱 | 反垃圾邮件|邮件客户端|网络安全 行业数据 | 邮件人物 | 网站公告 | 行业法规 网络技术: 邮件原理 | 网络协议 | 网络管理 | 传输介质 线路接入 | 路由接口 | 邮件存储 | 华为3Com CISCO技术 | 网络与服务器硬件 操作系统: Windows 9X | Linux&Uinx | Windows NT Windows Vista | FreeBSD | 其它操作系统 邮件服务器: 程序与开发 | Exchange | Qmail | Postfix Sendmail | MDaemon | Domino | Foxmail KerioMail | JavaMail | Winwebmail |James Merak&VisNetic | CMailServer | WinMail 金笛邮件系统 | 其它 | 反垃圾邮件: 综述| 客户端反垃圾邮件|服务器端反垃圾邮件 邮件客户端软件: Outlook | Foxmail | DreamMail| KooMail The bat | 雷鸟 | Eudora |Becky! |Pegasus IncrediMail |其它 电子邮箱: 个人邮箱 | 企业邮箱 |Gmail 移动电子邮件:服务器 | 客户端 | 技术前沿 邮件网络安全: 软件漏洞 | 安全知识 | 病毒公告 |防火墙 攻防技术 | 病毒查杀| ISA | 数字签名 邮件营销: Email营销 | 网络营销 | 营销技巧 |营销案例 邮件人才:招聘 | 职场 | 培训 | 指南 | 职场 解决方案: 邮件系统|反垃圾邮件 |安全 |移动电邮 |招标 产品评测: 邮件系统 |反垃圾邮件 |邮箱 |安全 |客户端 |